 |
DIY • Do it Yourself • Weekend Projects • BIG Projects • LITTLE Projects | |||||
|
DIY • Do it Yourself • Weekend Projects • BIG Projects • LITTLE Projects | |||||
How Do I Share My How-To?It's really pretty easy, pictures and videos of the steps it takes to complete your project are stored on YouTube and picasaWeb. Once your "final" video is stored on YouTube, your project will show in the listings on the site. All this is controlled by our Creator's Tools. Basically, you start a project by writing up the project idea. Step 1. Sign up for a free Creator's Account to gain access to the Creator's Tools. Step 2. Login Step 3. Push the "Create New Project" button on the Creator's Tools. Make a name (you can change it later) for your project. And describe your plans to use as notes to guide the creation of the steps. Step 4. When you've finished providing all the steps to your project, shooting the videos and saving to google video via the Creator's Tool Panel, you are ready to write the introductory paragraph with an interesting story of how you did it, or how you do it in the case of a professional services presentation. Step 5. Last but not least create and upload the video (to YouTube) which is the video that will be used to summarize the project. If you were building a robot, this final video would show the robot running around, doing fun things that will inspire others to create their version of your project. That's it... Watch the views and ratings for your project pile up along with the sales commissions! Or get a customer because you showed how you remodel a house. |
FAQ About Becoming A CreatorQ. Why would I go to all that work, building something, then put it on a website like C What I Can Do? What's the point? A. Actually, there are a couple of forms for a reward:
|
HELP :: How To Create a Project ... 32026 Views Author's name: Jim To Create A New C What I Can Do Project. * SignUp for Creator Account. It`s Free! * Login with your new User ID and Password. Now when you Click Creator`s Tools, you will be led to your creator`s account. * Create Your First Project. Just for an experiment. You can delete it from your Creator`s Tool any time. Author's Assigned Keywords: How multi Create a Project CwhatIcanDo HELP HELP (ad) From End To End an Overview This describes a typical Creator's process: When you start a new project, give it a WORKING TITLE: It's a working title, you can change it later. Break the project into its elements (The Creator Tool Calls Them "Steps") show the videos of the robot blowing up. Or the new idea you had falling into a lump of clay, all along sharing your failures or successes along the way. This leaves the history of your project in a way to let someone else try it too! Once the steps are finished, come back to this place and write up a story that will grab people's interest along with the final video, which you will put on YouTube. It's fine you can use our YouTube account if you don't want to create one. Now people on YouTube can see the steps that you used to create the project and see a video of the project in action. When they click on the project, the steps and their videos and pictures reveal the whole how to. Or the ideas that didn't work along the way. Step 1. In creating a project By now, you've learned that the top box is a place where you will show off your finished project. In this area you show each step in development. It's your choice, but the idea is you inspire someone to build their own version of your creation.
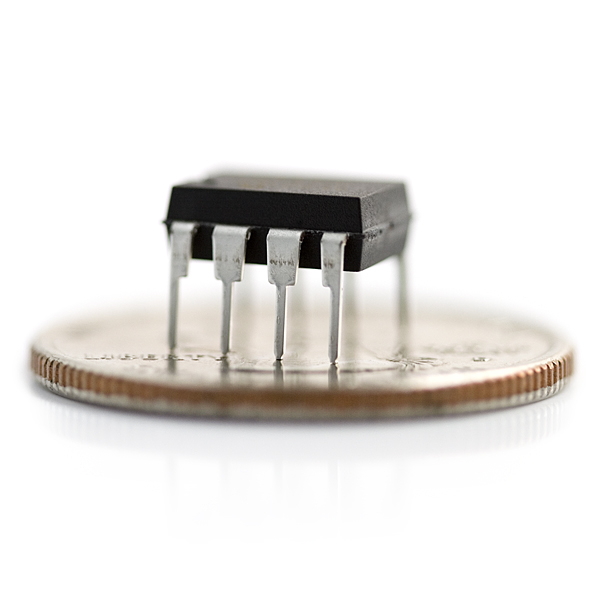
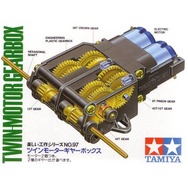
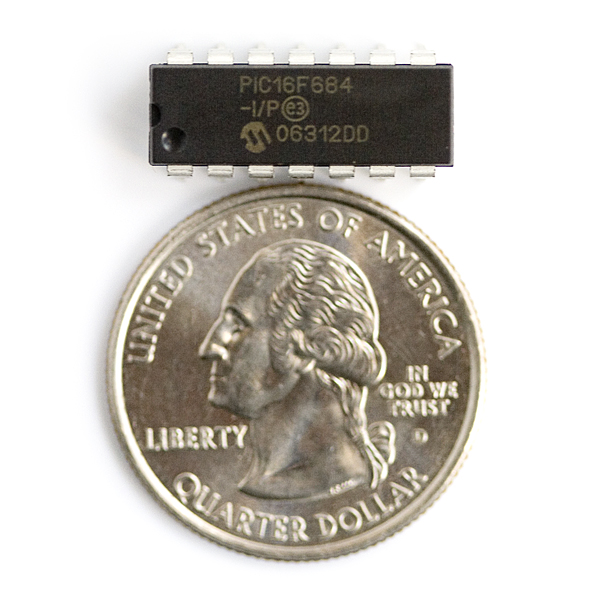
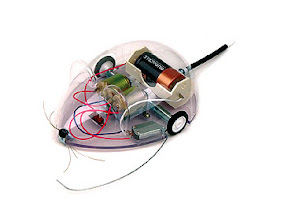
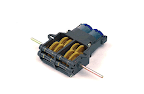
Say I intend to create a robot project so someone else can build something like it. I created my parts list which contained this particular motor and pointed the link for this part, so each time someone got inspired to build an RFL base like mine, they clicked right on the website to buy it online from a Robot Parts Supplier we had a distribution agreement with. Now each time someone wanted to build a robot like mine, CwhatIcanDo made money and everybody won. Me, the creator made some pocket change, but mostly it gave me street cred and helped CwhatIcanDo keep providing fun projects. Steps 2 through N How-To steps, as many as it takes...
When this is the last step, it is time to produce your final video, bring it up on You Tube and write the most stunning possible attention getting paragraph. Make them salivate, as they see your project do it's "thing". Create a frenzy: they simply must build one of these weekend projects! Tricks: 1. Choose a good login ID 2. Don't put any video in the top box, this will leave your project marked as "under construction. When you are ready to release the project, put in the video object in the You Tube player. Summary You used the top project box as a scratchpad while you created each step of the project using the creator tools. You created each step and illustrated it with a drawing or a video. When you finished, you put the project through it's paces in a video you also put on YouTube. Then you wrote a killer first line and an interesting paragraph. When you load the Final Video Into the First Step, your project is listed as a Finished Project and the "Under Construction" Bar is removed. Congratulations! Your First Project is complete on CwhatIcanDo! It's Easy To: C - What - I - Can - Do • Sign up - Get ID and Password• Plan and Create a Project That Someone Might Enjoy and May Even Want to Build• Link to your creation on your favorite social networking site or blog.• Become famous! Because your projects get a lot of Hits!
|
By Creators DoctorZoidberg: Converting a Flashlight to LED DoctorZoidberg: Home Project: MUTE TV Wearable TV Muter! DoctorZoidberg: Scare Crow - For Modern Gardens - Home Project jim: CwhatIcanDo Website jim: Tour This Website PaulSandin: Butler, a low-cost mobile robot base WeRbots: BEAM BOT: HexBug Exposed! WeRbots: Buggy Bot: Wire Frame Bot Body WeRbots: Easy Cheap Robot Weekend Project WeRbots: RFL Robot Out Of The Box Experience WeRbots: Robot Man: With Robot Demos WeRbots: Build Your Own Track Drive Robot WeRbots: Build a Robot In 5 Minutes WeRbots: i-Mon App WeRbots: How To Make A Virtual Robot in FLASH WeRbots: Droid From Motorola :: A Robot ? WeRbots: Robots Almost Anyone Can Afford WeRbots: How To Build a Robot in a Box WeRbots: picAxe 18m2 for robotics WeRbots: Build a Respectable Autonomous Robot WeRbots: On Line Neighborhood Watch WeRbots: Pong))))) WeRbots: Roboteer`s Guide to BeagleBone Black WeRbots: Autonomous Robot PVC "Pickup Truck" |
By Keywords Action Script 2: How To Make A Virtual Robot in FLASH Ajax: CwhatIcanDo Website Ajax: CwhatIcanDo Specs: RC2 Ajax: battle Android: Droid From Motorola :: A Robot ? Android: battle batting cage installation: Home Installation of a 4 Section In-Ground Batting Cage BEAM Robots: BEAM BOT: HexBug Exposed! BEAM Robots: picaxe 8m: Wall Follower Mouse gets Majorly Modded BEAM Robots: How to build simple analog balancing robots BEAM Robots: battle Block Watch Cam: On Line Neighborhood Watch Cheap Robot: Easy Cheap Robot Weekend Project Cheap Robot: How To Build a Robot in a Box Cheap Robot: Autonomous Robot Built From Power Chair Wheelchair commercial killer: Home Project: MUTE TV Wearable TV Muter! Convert Your Flashlight to LED: Converting a Flashlight to LED Create a Project: HELP :: How To Create a Project CwhatIcanDo HELP: HELP :: How To Create a Project Do it Yourself: Robots Almost Anyone Can Afford Do it Yourself: Scare Crow - For Modern Gardens - Home Project Do it Yourself: Wheelchair Works 3 Ways: Manual, R/C, and Autonomous Do it Yourself: On Line Neighborhood Watch Droid Smart Phone: Droid From Motorola :: A Robot ? Easy to Make Robot: Easy Cheap Robot Weekend Project entertainment: Home Project: MUTE TV Wearable TV Muter! FLASH Applications: How To Make A Virtual Robot in FLASH HELP: Tour This Website How To: CwhatIcanDo Website How To Build Cheap Bots: Robots Almost Anyone Can Afford How To Build Cheap Bots: How To Build a Robot in a Box How To Website: Tour This Website How To Website: CwhatIcanDo Website Infrared Proximity Sensor: Build Your Own Track Drive Robot IR Detector: Build Your Own Track Drive Robot Lighting Projects: Converting a Flashlight to LED logic analyzer: An affordable Logic Analyzer for the workbench. multi: Multi Media Messaging Device Mute the TV: Home Project: MUTE TV Wearable TV Muter! open source: An affordable Logic Analyzer for the workbench. picAxe: Build Your Own Track Drive Robot picAxe: picAxe 18m2 for robotics picAxe 08m: Robots Almost Anyone Can Afford picAxe 14m: picAxe 14m Motor Driver Board: Make Your Own picAxe 14m: How To Build a Robot in a Box picAxe 18m2: picAxe 18m2 for robotics picAxe 18m2: Weekend Project: Get Started With Robots picAxe 18m2: Build a Robot From A Power Wheelchair picAxe 18m2: Autonomous Robot Built From Power Chair Wheelchair picAxe 18m2: Wheelchair Works 3 Ways: Manual, R/C, and Autonomous picAxe 18x: How To Build a Robot in a Box picAxe 18x: picAxe 18m2 for robotics picAxe 18x: Build a Robot From A Power Wheelchair power wheelchair: Wheelchair Works 3 Ways: Manual, R/C, and Autonomous Quick Build Robot: Build a Robot In 5 Minutes RFL Robots: Building an RFL Inspired Upright Robot Base RFL Robots: RFL Robot Out Of The Box Experience robot bending: Morphibian Land Shark robot bending: Build a Robot From A Power Wheelchair Robot Man: Robot Man: With Robot Demos Robot Motor Control: Build the L298 H-Bridge Motor Control Robot Motor Control: Robot Basics Robot Motor Control: picAxe 14m Motor Driver Board: Make Your Own Robot Motor Control: Buggy Bot: Wire Frame Bot Body Robot Motor Control: picAxe 8 bit Motor Controller: Look Inside Robot Motor Control: How to build simple analog balancing robots Robot Motor Control: Build a Robot From A Power Wheelchair Robot Motor Control: Autonomous Robot Built From Power Chair Wheelchair Robot Pets: DogBot the Robo Dog : Robotic WatchDog Robot Pets: Operation of the Tri-Bot From Wowwee! Robot Pets: Robot Man: With Robot Demos robotics: Droid From Motorola :: A Robot ? robotics: Easy Cheap Robot Weekend Project Robots: BEAM BOT: HexBug Exposed! Robots: Robot Basics Robots: Buggy Bot: Wire Frame Bot Body Robots: Build a Robot In 5 Minutes Robots: Build Your Own Track Drive Robot Robots: Easy Cheap Robot Weekend Project Robots: How To Build a Robot in a Box Rumble Bot Conversions: Robots Almost Anyone Can Afford Security System: On Line Neighborhood Watch Select or type in a Keyword: Converting a Flashlight to LED track drive robot: Build Your Own Track Drive Robot Virtual Pet Robot: How To Make A Virtual Robot in FLASH web: CwhatIcanDo Website web 2.0 site: CwhatIcanDo Website web 2.0 site: CwhatIcanDo Specs: RC2 Weekend Project Robots: Easy Cheap Robot Weekend Project Weekend Project Robots: Weekend Project: Get Started With Robots |
Click To Expand / Contract Menus. View by Creator, Category, Keywords or Number of Views.